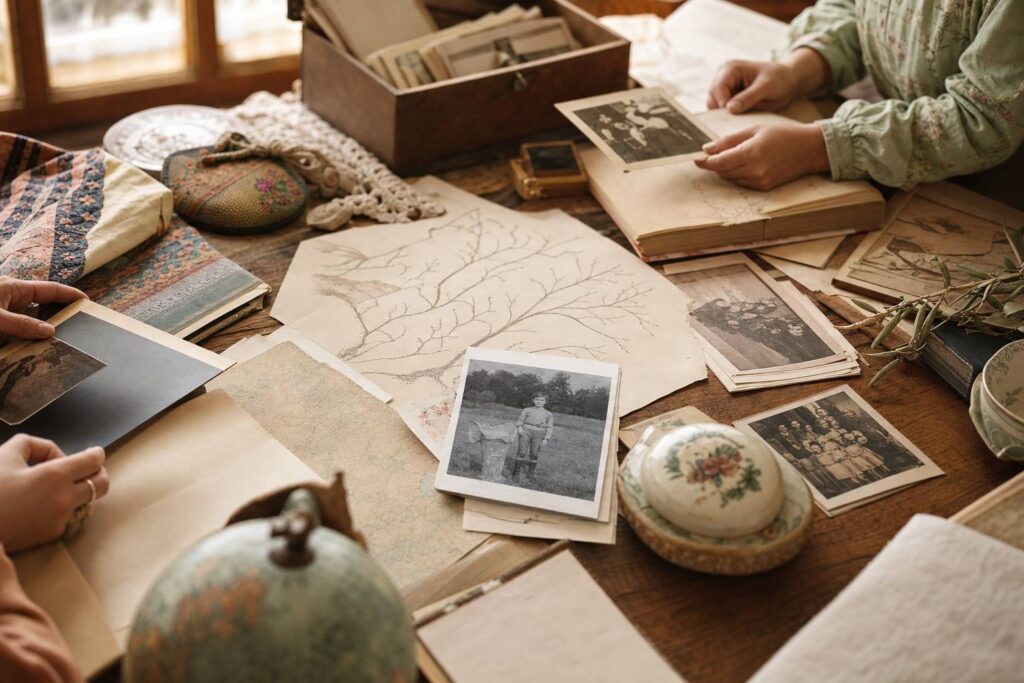
In brief
- Homemade Halloween masks, quick to prepare, with everyday materials, for a more flexible and less expensive Halloween party.
- Ideas sorted by age and level of detail, to keep the activity enjoyable, even with a quickly frustrated child.
- Concrete comfort and safety benchmarks, because a mask that itches or pinches too much ends up at the bottom of the bag before the rounds.
- A varied selection, from paper ghosts to more elaborate Calaveras, for fun creations suited to everyone’s tastes.
- A real “workshop at home” angle with simple gestures, realistic times, and no-sew options.
DIY Halloween masks for children: choosing a project suited to age, temperament, and available time
When a child embarks on craft activities around Halloween, the mask becomes a very particular playground. It touches the face, the field of vision, breathing, and sensory tolerance. A 3-4 year old child who tolerates finger painting very well can, at the same time, remove a mask after thirty seconds because it “tickles” the nose or obstructs the view. It is not willful disobedience. The facial skin is rich in nerve endings, and discomfort settles in quickly.
The choice of an easy craft therefore depends less on aesthetics than on three concrete parameters. The first is age. Before 5 years, a mask “held” by a stick (marotte type) is often better tolerated than an elastic behind the head. Between 5 and 7 years, children more willingly accept a mask that is worn, provided the edges are soft and the nose area does not rub. From 8 years old, the child can aim for finer details, cut precisely, and manage a slightly more rigid structure, such as light papier-mâché.
The second parameter is temperament. A child who gets discouraged quickly will need a quick and visible success. A pumpkin mask made from a paper plate, painted orange and then decorated with black triangles, gives an immediate effect. A meticulous child, on the other hand, can enjoy the progressive construction of a Calavera mask, where patterns are added in layers, first with felt-tip pens then with paint.
The third parameter is real time. Many families prepare children’s costumes between activities, late in the afternoon, when fatigue is felt. A project with “long drying” can then become a source of tension. In this case, it is better to have masks to make that progress in a 20 to 40 minute session, with a “finishing” option the next day.
Concrete comfort guidelines so the mask is worn for more than five minutes
A mask succeeds when the child forgets they are wearing it. A simple rule helps a lot. The eye openings must be larger than expected, because wearing the mask naturally reduces the field of vision. An oval that is too tight makes the eyes squint, tires the eyes, and can worry children sensitive to the loss of landmarks.
Contact on the face must also be prepared. If the base is cardboard or a plate, a slightly sanded edge (fine sandpaper) or covered with paper tape limits irritation. If the mask is worn with an elastic, two well-placed and reinforced holes prevent it from tearing when the child adjusts it. On the skin, a too thin elastic band marks quickly. A wider ribbon or a soft fabric attachment is often better accepted.
A table linking mask idea and level of autonomy
| Indicative age | Type of mask | Recommended base | Average time | Points of caution |
|---|---|---|---|---|
| 3-4 years | Ghost, simple pumpkin, simplified black cat | Thick paper + stick (marotte) | 15-25 min | Avoid small elements that easily come off |
| 5-7 years | Witch on a plate, vampire on a plate, felt wolf | Cardboard plate + wide elastic | 30-45 min | Generous eye openings, soft edges |
| 8-10 years | Detailed zombie, stylized bird, graphic spider | Cardboard + paint + glue | 45-70 min | Beware of too “realistic” textures that are too impressive |
| 10 years and up | Calavera in papier-mâché, structured Frankenstein | Template + light papier-mâché | 2 sessions | Drying and ventilation, avoid wearing as long as odor persists |
Once the right level is found, the creative workshop becomes smoother. The next section enters the concrete, with easy models to adapt, even when the house is not perfectly organized.

Halloween mask ideas to make with paper, cardboard, and plates: quick effects, guaranteed success
Paper and cardboard have a clear advantage for kids DIY. They are light, easy to cut, and allow retrying without drama if a cut goes sideways. Many families already have cardboard plates, thick paper, markers, and glue at home. With this base, it is possible to build very varied fun creations, from the “cute” mask to a scarier mask, without tipping into realism that could disturb some children.
Paper ghost mask: ideal for little ones who don’t like to wear something on their face
The ghost works well because its shape is simple. A hand-drawn template is enough, or a printed model. The eyes and mouth are easy to cut out, and the mask is held on a wooden stick. This detail changes everything for children who don’t like the pressure of an elastic. The gesture is also interesting developmentally. Holding a marotte engages hand-eye coordination, and the child can alternate “I show the mask” and “I look around,” without feeling trapped.
For a neater finish, slightly textured paper (drawing type) gives a softer white than standard sheet. A very light gray shadow with pencil on the edges creates relief without weighing down the face.
Pumpkin mask on a cardboard plate: a sturdy base for unlimited decoration
A cardboard plate becomes a pumpkin in a handful of steps. A layer of orange paint, a short drying time, then black triangles for the eyes and nose. Some children prefer a smiling mouth, others a grimace. This margin of control helps a lot, especially when the child needs to “decide” to get involved in the activity. When the child chooses a visible detail, they maintain effort better on the rest.
For the attachment, a soft ribbon is often more comfortable than a thin elastic. It ties, adjusts, and doesn’t pull hair. If the child wears glasses, one solution is to turn the mask into a “visor” held by hand or to enlarge the nose opening significantly so the glasses are not pushed.
Vampire mask on a plate: a step towards gluing and three-dimensional assembly
The vampire on a plate has a discreet educational interest. It requires assembling several pieces in a precise order. Painted black hair, marked eyebrows, overlapping eyes (white, purple, black), then glued fangs. Children aged 5 to 7 find a challenge fitting their level, especially if the adult prepares the shapes in advance. Once the mask is finished, a pair of small paper bats glued on the back reinforces the theme without overloading the front.
The mouth with fangs deserves attention. Too long points bend, come off, and sometimes end up in the mouths of younger kids. Short, rounded fangs hold up better. This kind of detail prevents conflicts when the child wants to “try it on” immediately.
Frankenstein mask in cardboard and markers: graphic, effective, without gore effects
Frankenstein is often associated with horror, but a mask can remain very child-friendly. A green cardboard, black lines for hair, a stylized scar with a marker, and the character becomes recognizable without being shocking. Children more sensitive to scary images thus benefit from the Halloween symbolism without being exposed to “realistic” textures. A “square” collar drawn under the face reinforces the look, even if the mask only covers the upper part.
Paper and cardboard open the door to quick variants. Black cat with pipe cleaner whiskers, bat with pointed ears, graphic spider with cut-out legs. The next section broadens the palette with more sensory materials, like felt, leaves, and papier-mâché, for richer creative hobbies.
To visualize simple cutting gestures and clean assemblies, a short video can help prepare the space before calling the child to the table.
DIY Halloween masks in felt, leaves, and papier-mâché: enriching sensory experience without complicating the activity
Some children like when “it holds,” when the material has thickness and softness. Felt responds very well to this need. It does not fray, cuts without crumbling, and is comfortably worn if seams or gluing remain flat. Leaves bring a seasonal dimension and a visual surprise because each vein becomes a pattern. Papier-mâché finally allows a more sculpted volume, to be reserved for children able to wait between sessions.
Felt skull mask: soft on the face, very readable from afar
The felt skull is liked because it is immediately recognizable. A black or gray base, bones drawn with white textile marker, then openings for the eyes. A popular variant is to add a small spider web on the forehead, cut from thin felt and glued. The detail is striking without being aggressive.
For parents who sew a little, two or three stitches are often enough to fix a piece durably. For others, a textile glue avoids thickness buildup. A good comfort guideline is to keep the inside of the mask as smooth as possible. Reliefs rub quickly at the cheekbones.
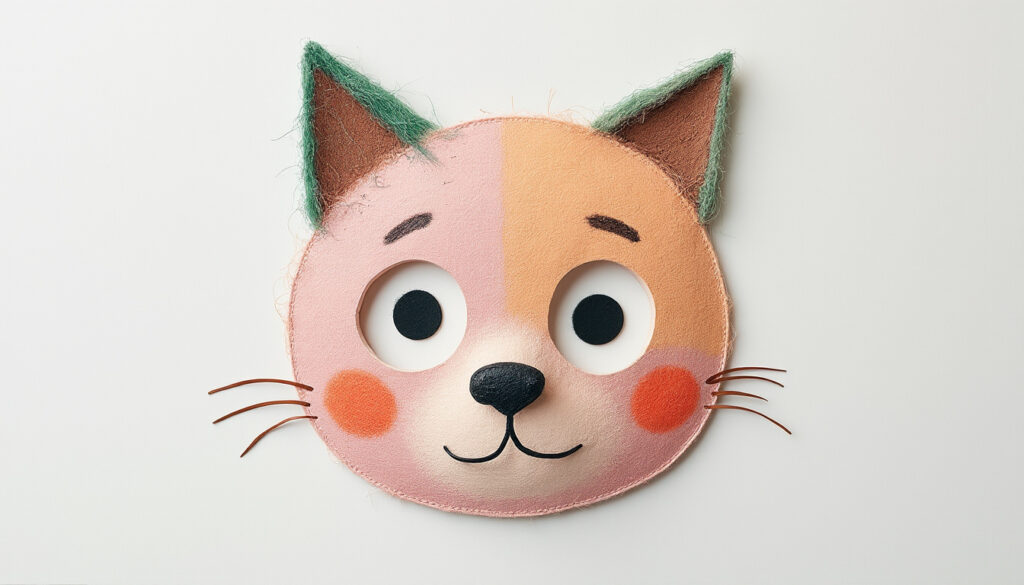
Felt wolf mask: perfect for playing with symmetry
The wolf mask engages a useful skill. The child understands that one side must “respond” to the other. If one ear is higher, the eye sees it immediately. It is not a mistake, it is an opportunity to talk about symmetry without making it a lesson. A white base can be covered with gray or brown felt, with accentuated eyebrows to give character. This type of mask pairs very well with simple dark clothing, simplifying children’s costumes when time is short.
Adult help may be necessary to cut angles near the eyes neatly. A child who tires at the end of the activity tends to speed up cutting. Accidents are rare, but caution is a simple rule. Scissors adapted to the child’s hand, stable table, and a break as soon as restlessness rises.
Leaf-made masks: an outdoor-indoor activity that regulates energy
Picking leaves before gluing creates a beneficial transition. The child discharges energy outside, then focuses inside. Sensory-wise, varied textures enrich the experience. A dry plane tree leaf cracks, a softer leaf bends, a veined leaf imprints its relief.
The mask can be built on a cardboard base cut in a face shape. Leaves become “feathers” or “scales” according to the child’s imagination. For Halloween, a “forest monster” effect works very well, especially with autumn colors. The activity remains simple, but the result is spectacular without paint.
Papier-mâché Calavera: a two-step project for older kids
The Calavera style, inspired by the Mexican Dia de los Muertos, has spread widely since the movie Coco. Children like the mix of patterns and colors. With a printed skull template, newspaper is glued in thin layers, then dried. The next day, paint and decorations follow. This rhythm teaches waiting, planning, and returning to finish an object. Not all children like this long time. When this is the case, a version in thick paper decorated with markers already gives a very satisfying result.
Papier-mâché requires proper ventilation during drying. If a smell persists, the mask is not worn yet. Children quickly sense when “it sticks” or when the smell bothers, and they are right to listen to this signal.
To go further in the Calavera universe without going into too technical a level, a video tutorial can guide the decoration steps and motif symmetry.
Setting up a Halloween creative workshop at home: organization, autonomy, and safety without rigidity
A successful creative workshop is rarely a perfect table. It is a simple organization that holds even when the child changes their mind halfway. The first step is to limit the number of available materials. Too many choices overload. Two bases (thick paper and cardboard plate), two tools (markers and glue), one “plus” option (stickers, fine glitter, or pipe cleaner) often suffice.
The child’s brain manages the activity better when the space is readable. A “clean” zone for ready elements, a “glue/paint” zone, and a “drying” corner. This separation reduces accidents such as glue on the mask handle. Children do not always anticipate the trajectory of their gestures. This is a skill that matures throughout childhood.
A short three-step sequence to maintain attention
Concentration varies depending on age and fatigue. For many children, 10 to 15 minutes of sustained attention is already a good benchmark, then a micro-break helps to resume. A three-step sequence adapts well to kids DIY. First the general shape, then the eye openings, then the decoration.
This progression avoids a common pitfall. The child starts with exciting details, gets tired, and no longer has the energy to cut the eyes properly. Yet, a bad opening really hinders wear. By keeping the eyes at the start, the mask remains functional, even if the decoration is then simplified.
Realistic material list for an easy craft (without overloading)
- Thick paper or thin cardboard, more stable than a standard sheet for drawing and cutting.
- Cardboard plates for round masks (pumpkin, vampire), light and sturdy.
- Markers and a gray pencil for tracing before coloring, which reduces errors.
- Glue stick for paper, liquid or textile glue for felt, in a thin layer.
- Wide elastic or soft ribbon for the attachment, more comfortable on skin and hair.
This intentionally limited choice gives space to the child. When a child wants to add “one more thing,” the adult can suggest a single additional option rather than opening an entire drawer. The framework reassures without stifling momentum.
Consultation box: when to adapt the activity or seek advice
Some children have marked sensory sensitivity. The mask on the face can provoke a strong reaction, unrelated to fear of Halloween. A simple adaptation is to switch to a stick-held mask, or a decorated headband that does not cover the eyes.
A consultation with a professional (doctor, ENT, orthoptist, or psychomotor therapist depending on the context) should be considered if the child systematically refuses anything touching the face and hair, if refusal is accompanied by intense and repeated crises beyond 6-8 weeks, if headaches appear when putting on a mask or glasses, or if the child complains of persistent blurred vision. These are not “serious” situations by principle but useful signals to look for a concrete cause rather than forcing.
Once the workshop is set, the next question comes quickly. How to choose themes that entertain without causing nightmares or anxiety? The next section deals with this balance precisely.
Making Halloween party joyful without overflow: balancing the “thrill,” supporting imagination, and preserving sleep
Halloween attracts because it allows playing with fear, but within a framework. For a child, the framework must remain stable. A mask too realistic, a zombie with “ripped flesh,” or a killer clown can excite some older children and disturb others. Parents often already know their child’s threshold. A child who jumps at a slightly tense cartoon doesn’t have the same appetite for scary things as a child who laughs in front of a plastic monster.
A young child’s brain still poorly distinguishes imagination from reality when the representation is very realistic. It is not a lack of maturity but a normal stage. Images imprint and return at bedtime, when voluntary control decreases. A “very real” mask can then turn into a nighttime scenario. Conversely, a stylized monster, with large shapes and clear colors, allows playing with the thrill without invading the night.
Monster masks: favor stylization for the youngest
Monster masks work very well in families. They give total freedom of colors and shapes. A child can glue “horns” made of paper, draw triangular teeth, add three eyes. The result amuses because it is invented, not because it looks like a wound. This distinction is precious. It allows parents to propose a festive Halloween without aligning with an adult aesthetic.
For older children, a more detailed monster can be satisfying, provided the child leads the level of intensity. A child who chooses the scary themselves regulates better because they remain the actor. A child to whom a strong image is imposed undergoes it.
Zombie and killer clown: reserve certain themes for children who request and are ready
A very realistic zombie mask is often recommended from 8 years old, sometimes more, depending on sensitivity. Realism also requires more technique. Color gradients, texture effects, fine cutouts. If the child wants this theme, a useful compromise is to keep a “comic book” zombie rather than a “wounded” face. This protects younger children who will see the mask during the rounds and limits emotional load.
The killer clown carries particular ambiguity. The clown is supposed to be funny, and the reversal can be impressive. If the child insists, a clear family rule can help. The mask stays for play at home, and another more neutral mask is chosen for going out. This boundary prevents fear reactions in other children and maintains a serene atmosphere.
Phosphorescent, bat, black cat: effective themes for going out and safety
A phosphorescent mask attracts the eye. In the dark, it makes the child visible, which is a concrete benefit during rounds, especially in poorly lit areas. The making can remain simple, with paint or suitable markers applied in clear patterns. It is better to test under a lamp’s light to check the effect without disappointment the same evening.
The black cat remains a classic. A black mask, whiskers, a pink or gray nose, and the face lights up. The bat, with its pointed ears, also works very well and pairs with dark clothes already present in the wardrobe. When the mask complements a costume without requiring a full outfit, the preparation of the Halloween party becomes much lighter for parents.
Halloween masks can thus serve two goals. To create play and to secure the child in the atmosphere. The thread naturally continues towards the end of the article with practical answers to the questions most often asked when starting.
Which DIY mask to choose if the child does not tolerate the elastic behind the head?
A mask held by a stick (marotte) is often better tolerated, especially before 5 years. The thick paper ghost is a simple option. ‘Visor’ style masks (held by hand or placed on the forehead) may also suit if the child poorly tolerates pressure on the face or hair.
How to prevent the mask from itching or leaving marks on the skin?
Larger eye openings limit rubbing. A cardboard edge smoothed with fine sandpaper or covered with paper tape improves comfort. For the attachment, a soft ribbon or wide elastic leaves fewer marks than a thin elastic, especially if the child sweats a bit during rounds.
What ‘fear’ level is appropriate for a preschool child?
Stylized shapes work better than realism. Pumpkin, black cat, bat, colorful monster, smiling ghost allow playing with the thrill without invading the imagination. Very realistic zombie or killer clown masks are often better suited for older and more demanding children, with dosing according to their sensitivity.
Is papier-mâché a good idea with a child?
From 8-10 years old, often yes, because the child can respect drying time and return to finish the project. The Calavera papier-mâché version is interesting in two sessions. Proper ventilation during drying is useful, and the mask is not worn as long as a glue odor persists.
What to do if the child gets discouraged in the middle of the activity?
Returning to a ‘quick success’ step helps. First finish the eye openings to make the mask usable, then simplify decoration with a few large and visible shapes. Keeping a finishing option for the next day protects the atmosphere and avoids turning creative leisure into a test of patience.